
From kneeling to standing
Knee-stand on both knees and placing one foot forward to stand in the asymmetric knee-stand, and back again. Side-bending of the torso while leaning on one hand, in the asymmetric knee-stand. Lifting the pelvis with the help of both knees and a neck, shoulders, chest that are not tensed up, with undisturbed breathing. To come up to standing on both legs, and down again to the asymmetric knee-stand with changed over legs.
In the first part of the lesson the change from kneeling on both knees to kneeling on one knee and one foot is explored. How do your many parts relate to and support each other, and what pathways do they have to take through space: your moving leg, your neck, your shoulders, your torso, your pelvis? You improve your balance and movements by becoming aware of involuntary tensing up of muscles and holding of breath. The second part of the lesson builds on (and does require) the improvements and learning of the first part, and explores the lifting of the pelvis from kneeling to standing, with a focus on weight distribution over both legs.
kneelingkneelinglungestanding kneeling_up_1
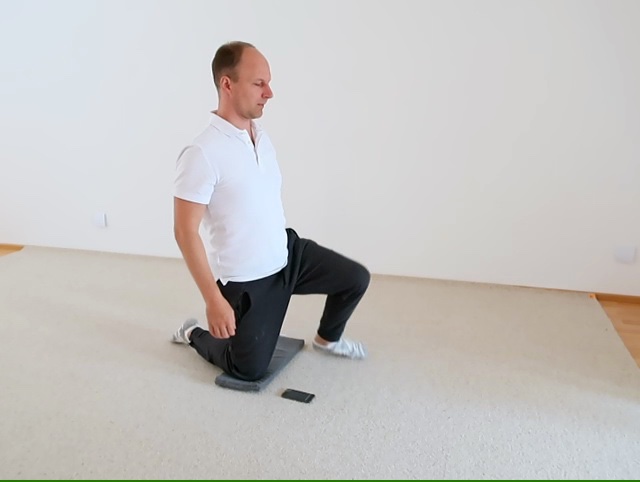
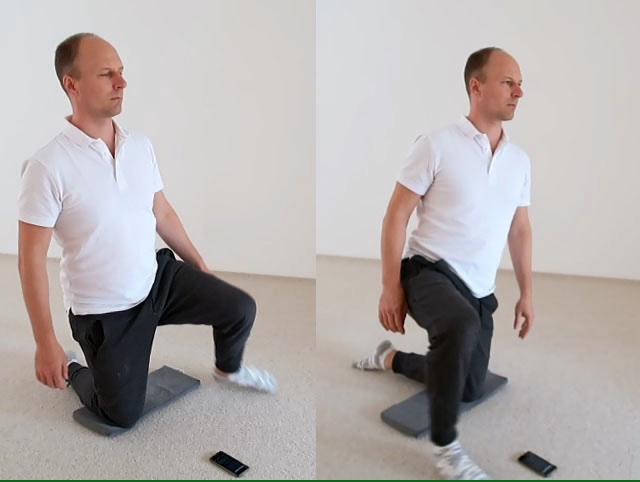
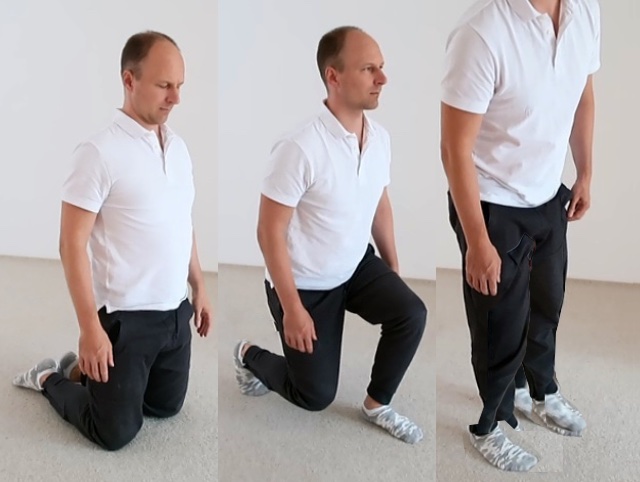
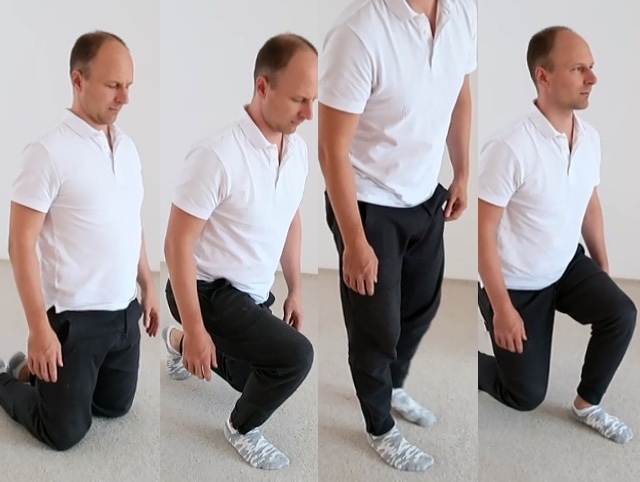
Kneel on both knees.
Stand the right foot
Stand your right foot on the floor, then return your right knee to stand on both knees again.
- Do this many times, without disturbing your breathing.
The pelvis and torso are balanced on top of your left hip joint.
Don't tense up your shoulders, let your head and chest be soft and side-bend to the left, so that you don't need to use your arms for balance.
Stand the right foot
Stand your right foot on the floor, then return your right knee to stand on both knees again.
Kneel on both knees.
Continuation
Stand the right foot, slower
Move slowly enough to allow mistakes to become apparent.
- These mistakes may limit further improvement, therefore they can be considered „serious mistakes”. They need to be found and smoothened out.
The neck needs to be free to turn, the eyes free to look around, and the chest needs to be soft enough to be able to side-bend smoothly.
Become aware if and when you hold your breathing.
Continuation
Stand the right foot, slower
Move slowly enough to allow mistakes to become apparent.
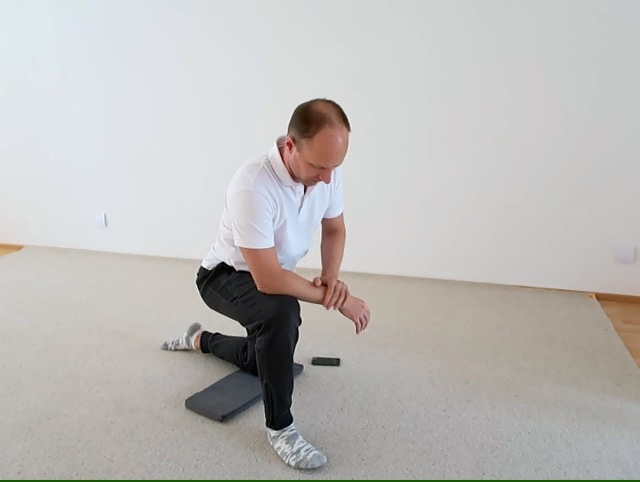
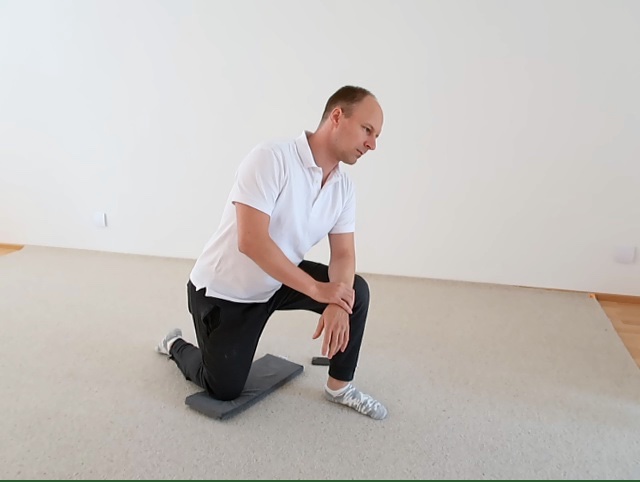
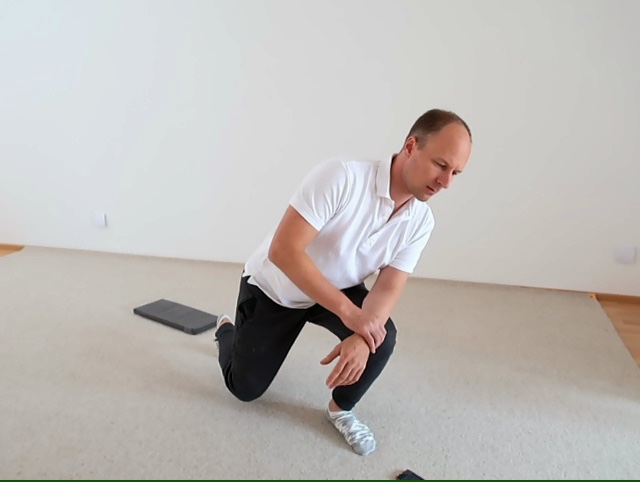
Kneel on your left knee, with your right foot standing. Lean with the right elbow on your right knee.
Bend to the left
Attend to the great many details of side-bending in your neck and chest, and your breathing.
- Allow your neck to tilt sideways, to bring your left ear closer to your left shoulder.
During side-bending the left side of your chest shortens, at the same time the right side lengthens, thus changing the space and possibilities for breathing.
Bend to the left
Attend to the great many details of side-bending in your neck and chest, and your breathing.
Kneel on your left knee, with your right foot standing.
Stand the right foot, no leaning on hands
Don't tense up your shoulders, let your arms hang casually. How far do you have to move your right foot to the side?
- Balance with ease, don't tense up anything.
How much do you have to side-bend?
If you try to move the leg on a straight path it is more likely to disturb your balance.
Stand the right foot, no leaning on hands
Don't tense up your shoulders, let your arms hang casually. How far do you have to move your right foot to the side?
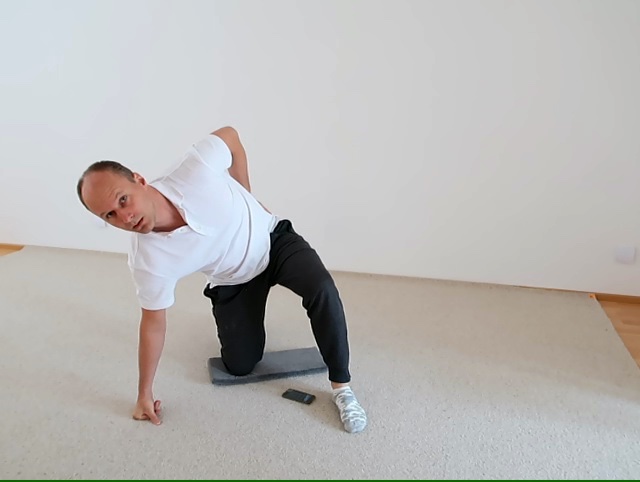
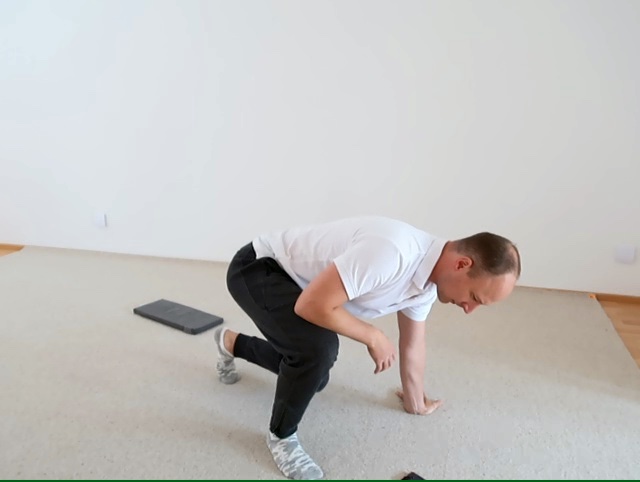
Kneel on your left knee, with your right foot standing. Lean with your left hand on the floor in any place comfortable.
Stand the right foot, lean on left hand
The torso is bent to the left and clearly balanced on the left leg and arm; the right leg is free to move.
- Let it become simple and soft. This simplicity and softness is necessary to be able to arrive at the same movement without the hand standing.
When you lean on the hand, the right leg goes much more to the side, to the right. Do not disturb it. It will find it's best route, and its best place.
Continue to make sure that there will not be any disturbance in your breathing.
Stand the right foot, lean on left hand
The torso is bent to the left and clearly balanced on the left leg and arm; the right leg is free to move.
Kneel on your left knee, with your right foot standing.
Stand the right foot, faster
Once you feel well balanced when moving slowly, do it more quickly, and as fast as possible.
- Make sure your neck stays soft and could turn freely.
I don't let the movement disturb your breathing.
Place the right foot and right knee only for a moment, don't rest, but continue to move quickly.
Stand the right foot, faster
Once you feel well balanced when moving slowly, do it more quickly, and as fast as possible.
Stand on both knees.
Stand the left foot
Move slowly. Pay attention to the differences between one side and the other.
- The pelvis, the spine, the head and the chest need to be hanging freely without any effort.
The spine must be free to bend in all places including the neck and lower back, and return to neutral smoothly.
Stand the left foot
Move slowly. Pay attention to the differences between one side and the other.
Kneel on your right knee, stand your left foot. With your left elbow lean on your left knee.
Bend to the right
Pay attention to how different the movement is on one side from the other. It can feel like a completely different movement.
Bend to the right
Pay attention to how different the movement is on one side from the other. It can feel like a completely different movement.
Kneel on your right knee, stand your left foot. Lean with your right hand on the floor, somewhere to the right of you.
Stand the left foot, lean on right hand
When your the breathing is uninterrupted and free, the problem of balance disappears and the leg moves with ease.
- To progress in this lesson it is necessary to move with the same ease and the same organization in the other movements.
Stand the left foot, lean on right hand
When your the breathing is uninterrupted and free, the problem of balance disappears and the leg moves with ease.
Kneel on both knees.
Stand the left foot, no leaning on hands
Slowly let go with the right hand and move the left leg without the help of the hand.
- Observe how you clearly bend your head and the whole back to the right while standing your left foot, and how you straighten again while returning the left leg to stand on the left knee.
Stand the left foot, no leaning on hands
Slowly let go with the right hand and move the left leg without the help of the hand.
Stand on both knees.
Stand right and left foot, alternately
Do not bend from side to side overly eagerly. Feel and move just the amount that is necessary.
- Continue slowly and pay attention to the bending of the head from right to left; and to the movement of breathing. And to the freedom in the neck and chest, movement without restrictions.
Observe the differences between one side and the other.
Stand right and left foot, alternately
Do not bend from side to side overly eagerly. Feel and move just the amount that is necessary.
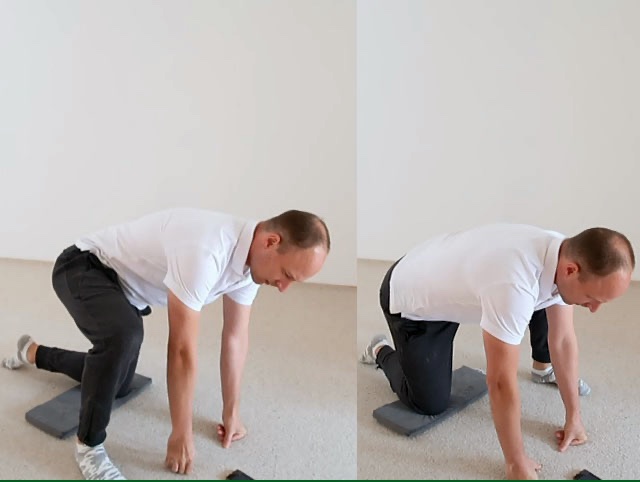
Stand on both knees. Place both hands on the floor, in front.
Stand right and left foot, alternately
First move slowly, then quickly. To which side is there a change along the way in terms of speed?
- To which side do your back and pelvis bend with less disturbance?
In which direction does the foot face when standing it? Do not direct it, but rather place it wherever it faces. It needs to direct itself.
Do not bend your foot side-ways, do not turn it outwards, nor inwards; let it always be aligned with the lower leg.
Stand right and left foot, alternately
First move slowly, then quickly. To which side is there a change along the way in terms of speed?
Kneel on your left knee, with your right foot standing. With your right elbow lean on your right knee. Stand the toes of the left foot as if for running.
Lift the left knee from the floor
Place the knee back down gently. It shouldn't go down with a hard bang, but like a soft kiss.
- In order to lift and land the knee softly it is necessary to shift most of your weight to the right foot, and press the floor with the big toe of your left foot.
If the knee bangs down you are either holding your breath, or your right foot stands too much forward.
Keep your right foot standing firmly on the floor, at all times. Don't move your right knee overly much forward.
Lift the left knee from the floor
Place the knee back down gently. It shouldn't go down with a hard bang, but like a soft kiss.
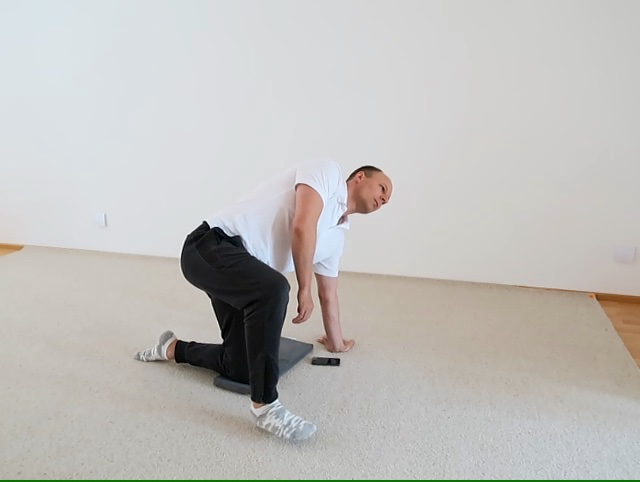
Kneel on your left knee, stand your right foot. With your right elbow lean on your right knee. With your left hand lean on the floor. Stand the toes of your left foot as if for running.
Lift left knee, lean on left hand
Place equally much weight on either arm. Allow your pelvis to shift to the right, and your head to go down.
- Your head and shoulders go down lower during the movement, to counter-balance the rising of your pelvis. The movement is simple and the head goes down farther and farther.
Do not tense up your neck, shoulders and chest; keep your breathing undisturbed.
The leaning on the arms is used to find unnecessary efforts that are covered up by the powerful legs. Eventually the movements will be equally easy, with or without hands.
Lift left knee, lean on left hand
Place equally much weight on either arm. Allow your pelvis to shift to the right, and your head to go down.
Kneel on your left knee, stand your right foot. Stand the toes of your left foot as if for running.
Lift left knee, more & more hands-free
Gradually drop the support of your arms. When the pelvis lifts it should feel light, easy to do.
- Try a number of times with and without arms, until you can clearly become aware of unnecessary efforts.
If it seems hard, it may be because the right leg stands too much forward or backward, or because the right leg is favoured over the left leg.
The intention is to simply lift the pelvis. Then it becomes easy.
Lift left knee, more & more hands-free
Gradually drop the support of your arms. When the pelvis lifts it should feel light, easy to do.
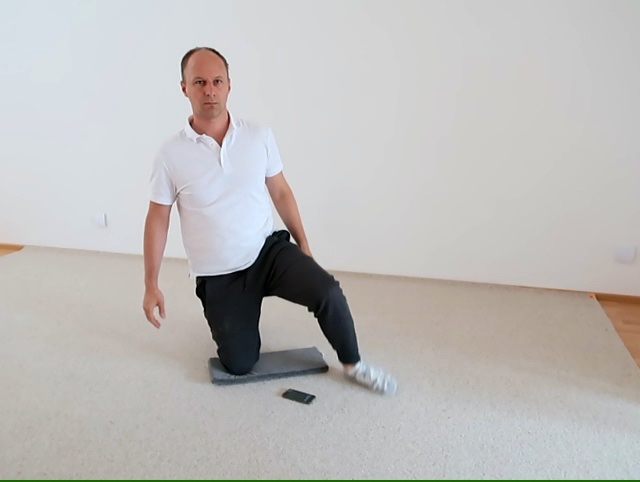
Kneel on both knees. Arms hanging freely.
Stand right foot, lift left knee
Place your right foot on the floor, lean on the left big toe, lift left knee, return. Hands-free.
- Keep your neck and chest soft. Watch your breathing. Move your leg to standing in an arc, not straight underneath your hip joints.
Unnecessary efforts disturb and limit the speed and quality of the movement.
Move slowly at first, faster as it becomes easy.
Stand right foot, lift left knee
Place your right foot on the floor, lean on the left big toe, lift left knee, return. Hands-free.
Kneel on both knees. Arms hanging freely.
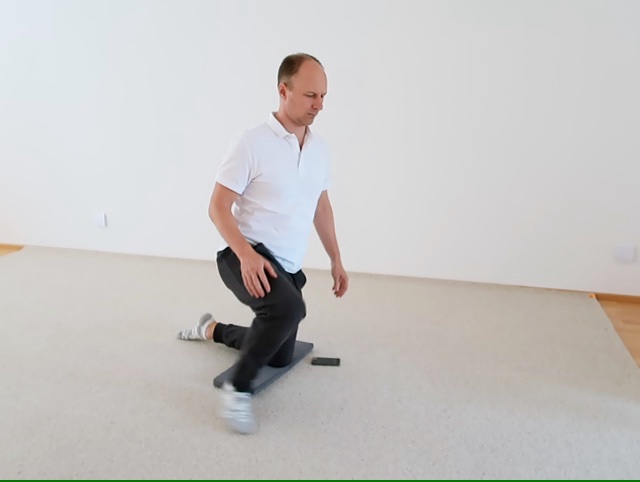
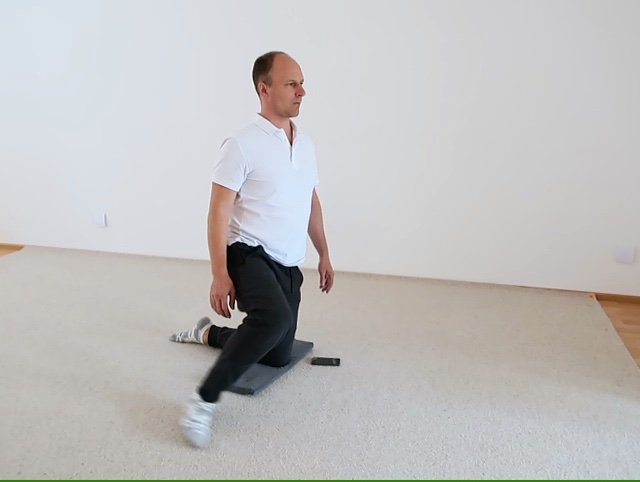
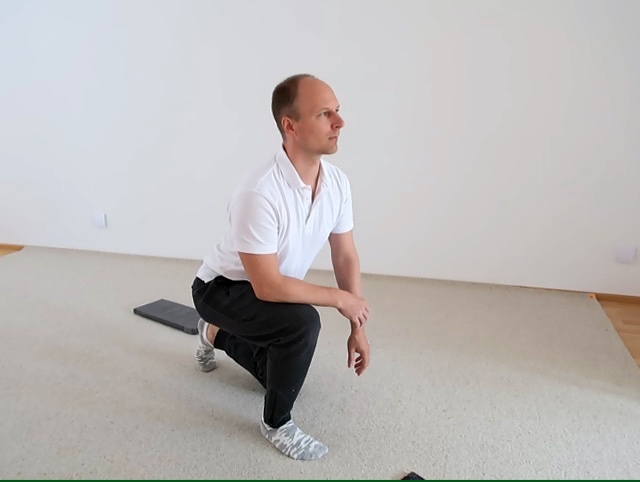
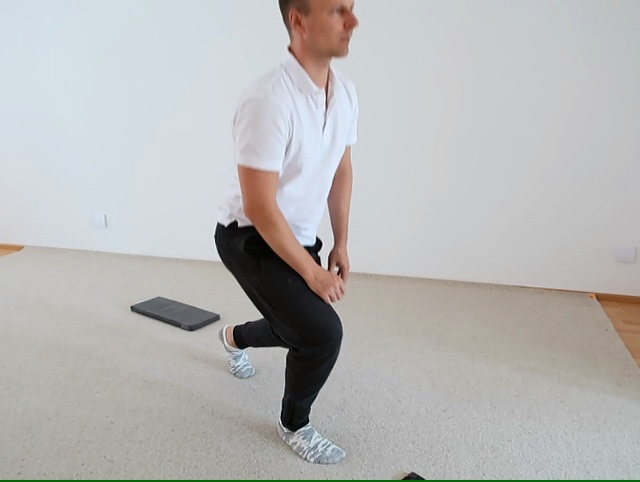
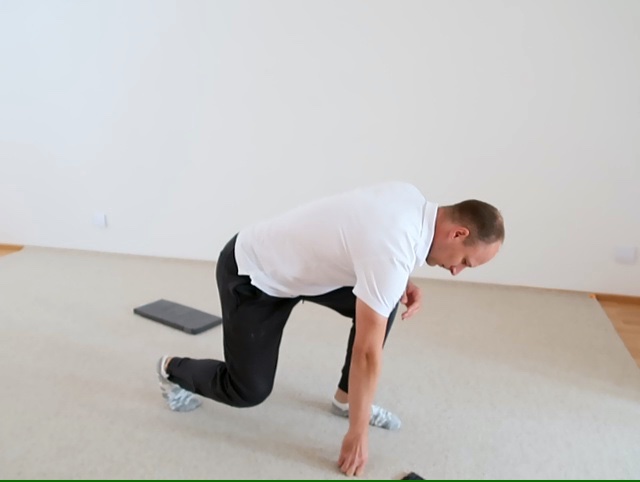
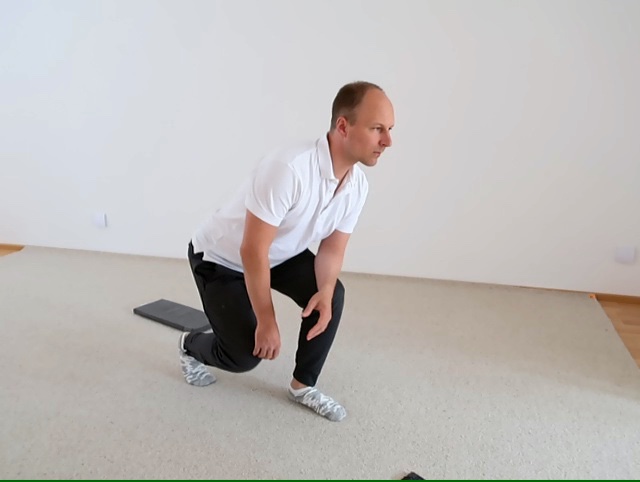
Stand right foot, lift pelvis, stand up
Combine the previous motions to come up to standing, and back down again fluently, slowly, without disturbances.
- Come up to standing on both legs, with feet spread apart as they come to stand, the feet not joined together.
Then return back down to kneeling on both knees again.
Stand right foot, lift pelvis, stand up
Combine the previous motions to come up to standing, and back down again fluently, slowly, without disturbances.
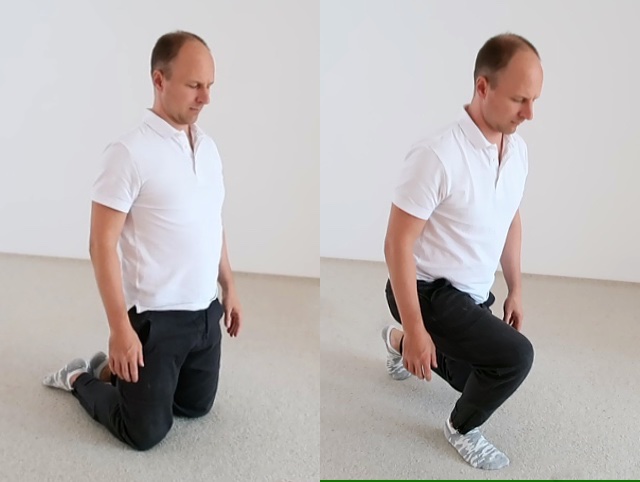
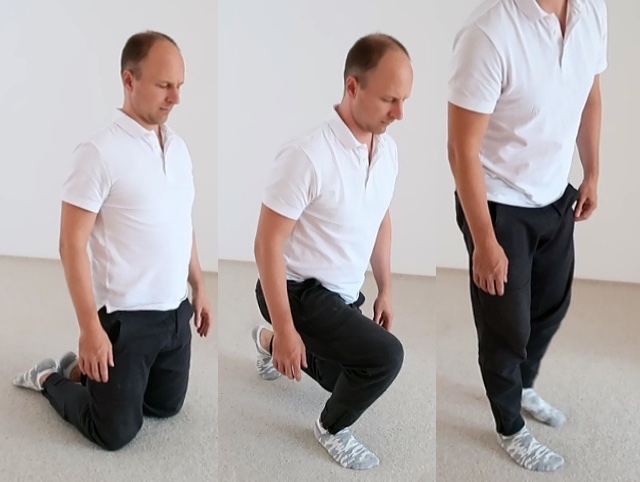
Change over the legs and arms: kneel on your right knee, with your left foot standing. With your left elbow lean on your left knee. Place the toes of the right foot as if for running.
Lift the right knee from the floor
Are there differences from one side to the other? With almost everyone one side is easier than the other.
- The difficult side might be so difficult that it seems impossible to get up. This means the neck, chest and lower back are held stiff, effort too much, the pelvis cannot move freely.
Bend your head to the side and allow your pelvis to move, don't hold your breath. Then it will become easy.
Lift the right knee from the floor
Are there differences from one side to the other? With almost everyone one side is easier than the other.
Kneel on your right knee, stand your left foot. With your left elbow lean on your left knee. With your right hand lean on the floor. Stand the toes of your right foot as if for running.
Lift right knee, lean on right hand
Allow your pelvis to shift to the left, and your head to go down.
Lift right knee, lean on right hand
Allow your pelvis to shift to the left, and your head to go down.
Kneel on your right knee, stand your left foot. Stand the toes of your right foot as if for running.
Lift right knee, more & more hands-free
Watch out for any effort and disturbance, until your pelvis lifts equally easily with or without the help of the arms.
Lift right knee, more & more hands-free
Watch out for any effort and disturbance, until your pelvis lifts equally easily with or without the help of the arms.
Kneel on both knees. Arms hanging freely.
Stand left foot, lift right knee
Place your left foot on the floor, lean on the right big toe, lift right knee, return. Hands-free.
Stand left foot, lift right knee
Place your left foot on the floor, lean on the right big toe, lift right knee, return. Hands-free.
Kneel on both knees. Arms hanging freely.
Stand left foot, lift pelvis, stand up
Combine the previous motions to come up to standing, and back down again fluently, slowly, without disturbances.
Stand left foot, lift pelvis, stand up
Combine the previous motions to come up to standing, and back down again fluently, slowly, without disturbances.
Kneel on both knees. Arms hanging freely.
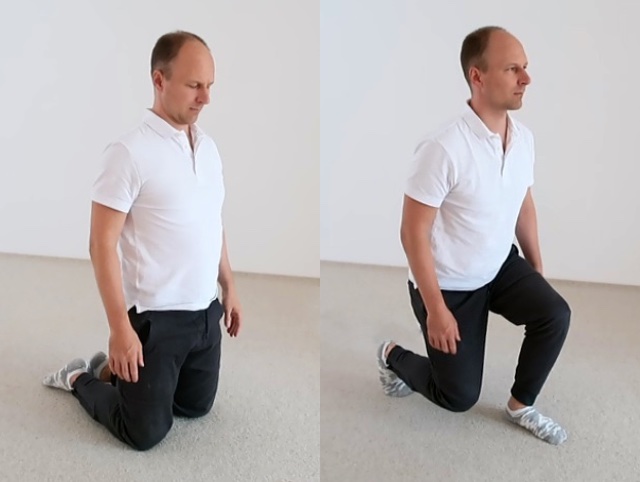
From kneeling to standing and back
Stand one foot in front, come up to standing, place the other foot behind, come down to kneeling.
- Pay attention to which side feels better, moves better. It is not an issue of the leg. Maybe it is the entire spine that is held stiffly to one side, or the pelvis, a hip joint, a big toe, or a foot.
Try to learn from the better side.
Keep all the things in mind that lead up to the complete movement. Go slowly at first. Don't introduce new mistakes. Only then make it faster.
From kneeling to standing and back
Stand one foot in front, come up to standing, place the other foot behind, come down to kneeling.
